iPhone 17 Pro Backplate for Elgato Prompter
Brian
I launched an internal podcast this year for community enablement. A month in, the format has been a great for sharing knowledge across the organization. There are several benefits that made this approach compelling:
- Quick turnaround means content stays fresh compared to periodic documentation refreshes or lengthy webinar planning cycles
- On-demand viewing lets community members watch any time on mobile, perfect for commutes or whenever they have a few minutes
- Reduced calendar fatigue since there are just too many enablement sessions competing for attention and people tend to ignore them
- Global accessibility solves the timezone problem where live sessions frustrate colleagues in Asia and Europe who never get to attend live while Americas-based members can
- AI-ready content since we can feed the transcripts into our RAG system to keep our knowledge base current
With all of these videos in my future, I decided to invest in some new gear. I picked up an Elgato Prompter, which is essentially a beam-splitter that sits in front of your camera paired with a small LCD display. It lets you read text or see your video call guests while looking directly into the lens.
Using it as a Teleprompter
The primary use case is as a traditional teleprompter. I can display my script on the screen and read it while maintaining direct eye contact with the camera. The text reflects off the glass at a 45-degree angle, so I see the words but the camera sees straight through to me.
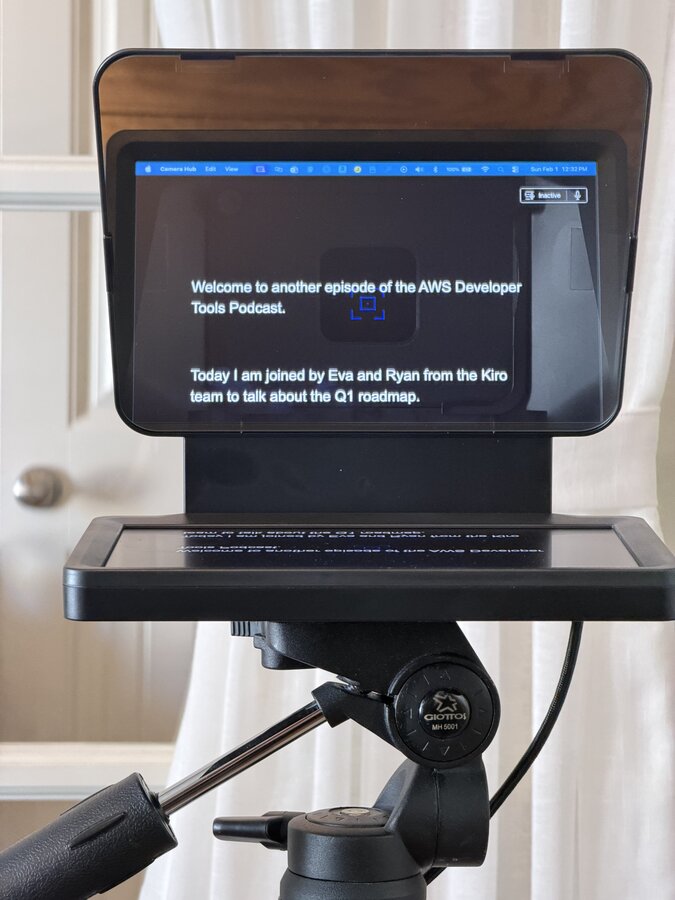
This works beautifully for scripted content. I use the Elgato Prompter app to control the scroll speed, or use AI to follow what I am saying. The result is polished video where I’m looking directly at the viewer instead of glancing off to the side at notes.
Using it for Video Calls
I also use it as an external monitor during video calls and podcast recordings. By mirroring my guest’s video feed to the prompter screen, I can look at them while simultaneously looking into the camera. This creates much better eye contact than the typical webcam-above-the-screen setup where you’re always looking slightly down.
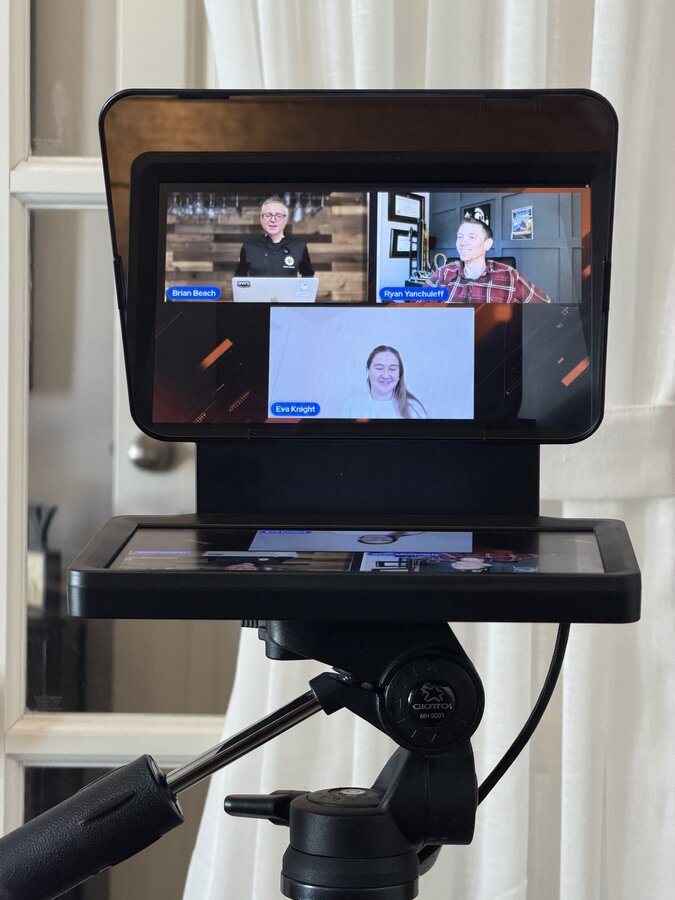
There is one trade-off with this approach. The beam-splitter glass does introduce a slight blue color cast to my video since the camera is recording through it. It’s subtle and can be corrected in post-production, but it’s worth noting if color accuracy is critical for your use case.
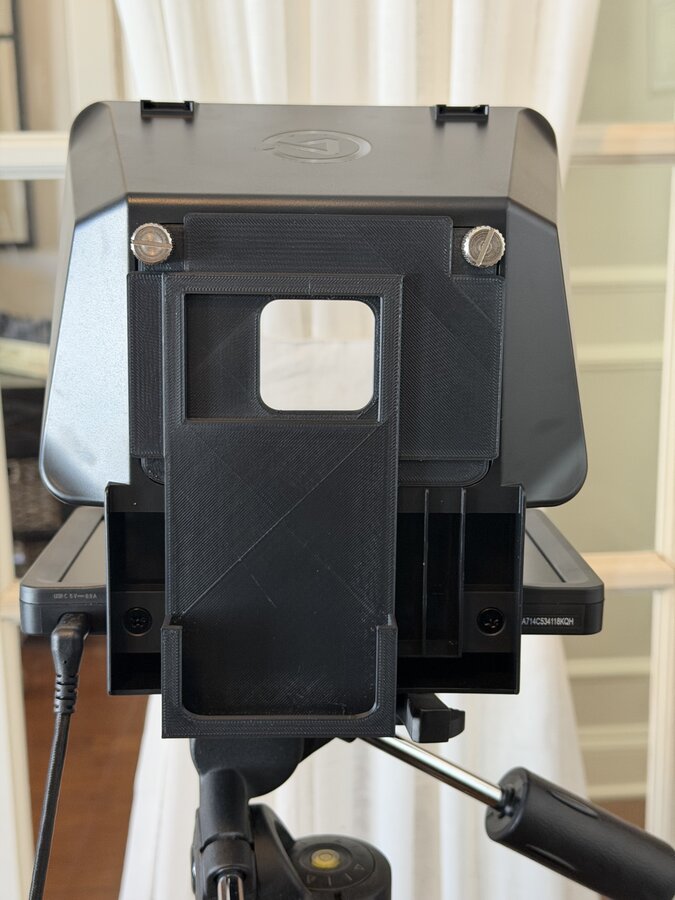
iPhone Backplate
The Elgato Prompter ships with several mounting options out of the box. You get backplates for standard webcams and various diameter lenses for DSLRs and mirrorless cameras.
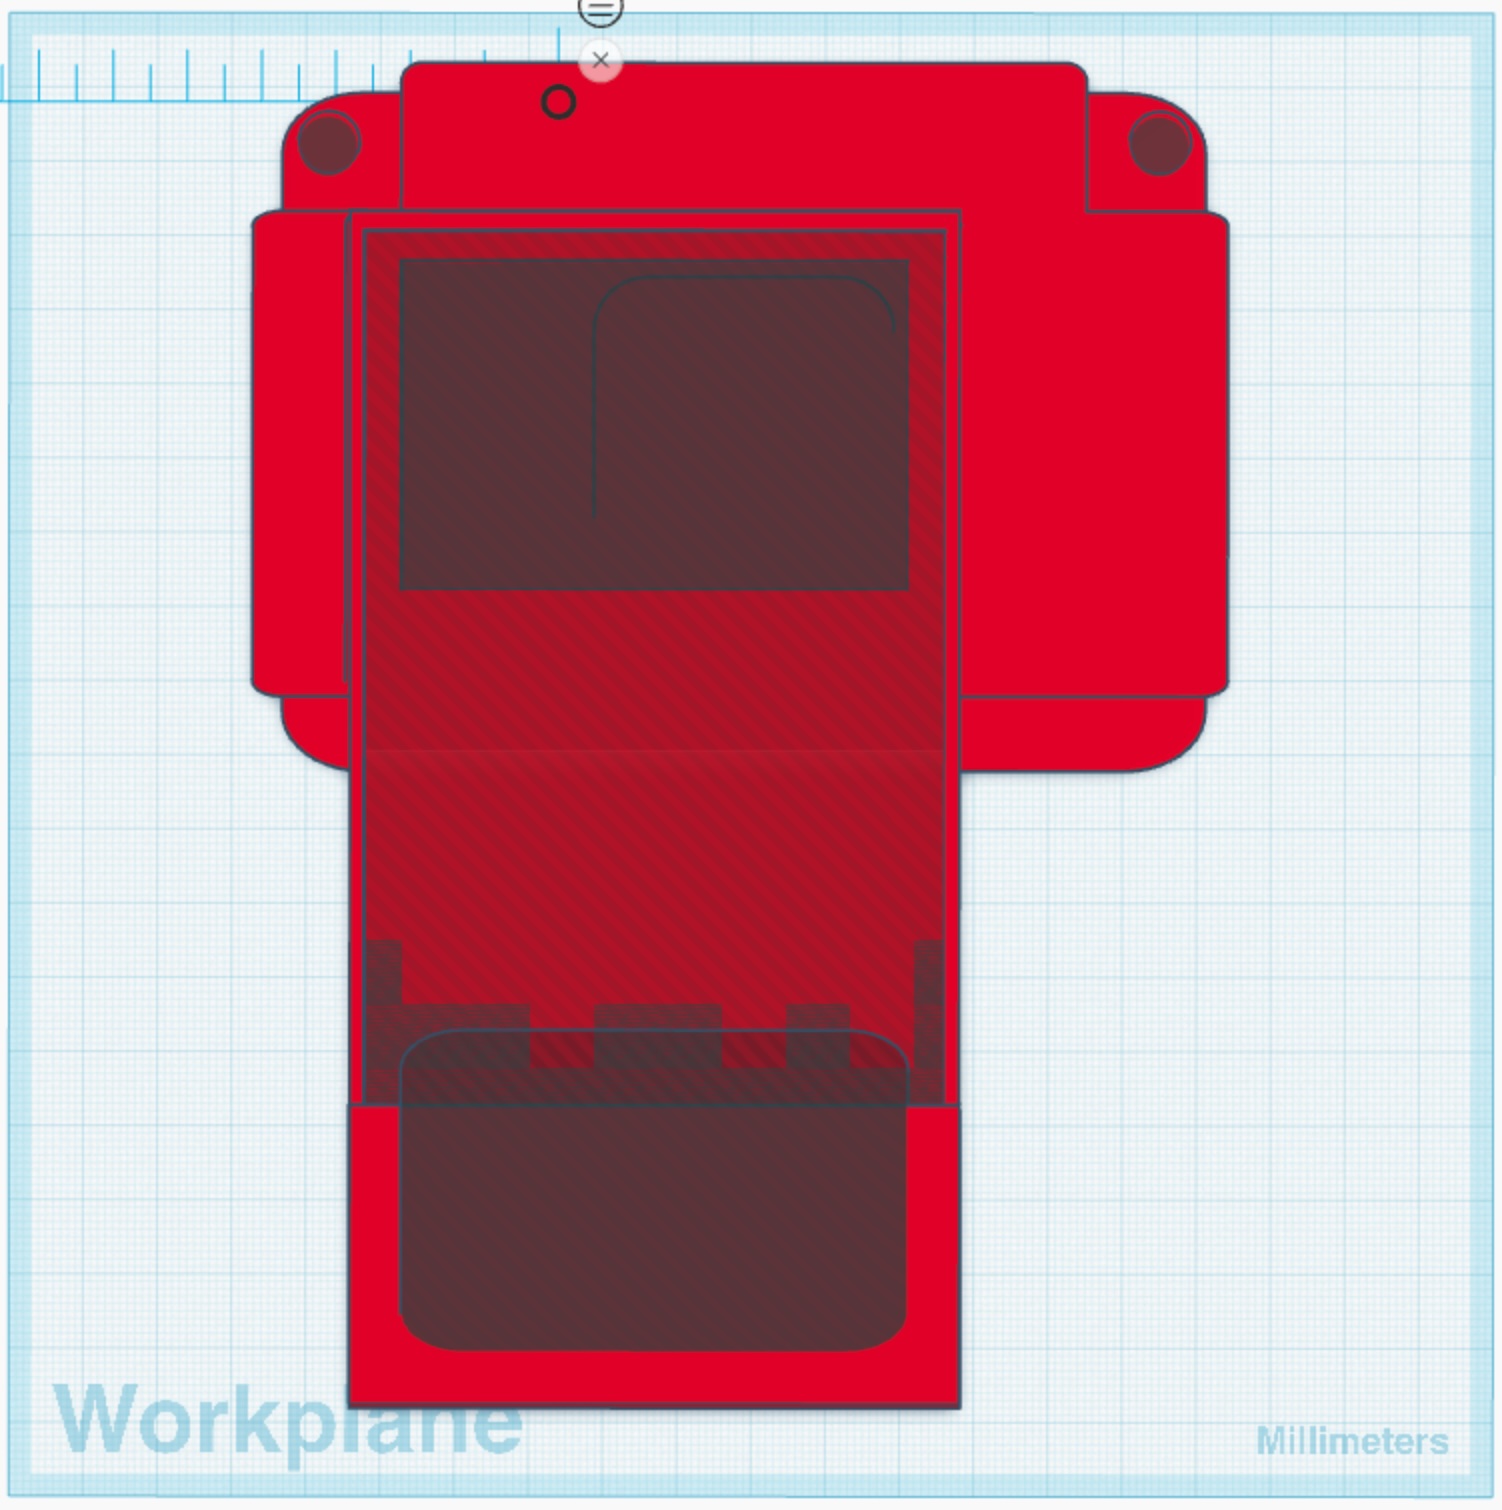
However, it did not include a backplate for mounting a smartphone. I wanted to use my iPhone 17 Pro as the camera since the video quality is excellent. There are a few 3D printable templates floating around the web, but none fit the iPhone 17 Pro dimensions. Additionally, I wanted to keep my phone in its case rather than removing it every time I record.
So I designed and printed my own custom backplate using Tinkercad. The design is straightforward: a rectangular frame sized for my phone in its case, with the standard Elgato mounting pattern on the back. I added a generous camera cutout to ensure nothing obstructs the lenses.
Once the design was complete, I exported it as an STL file for printing. I used PLA filament, which provides enough rigidity to hold the phone securely without wasting material. The print took about two hours on my Creality Ender printer.
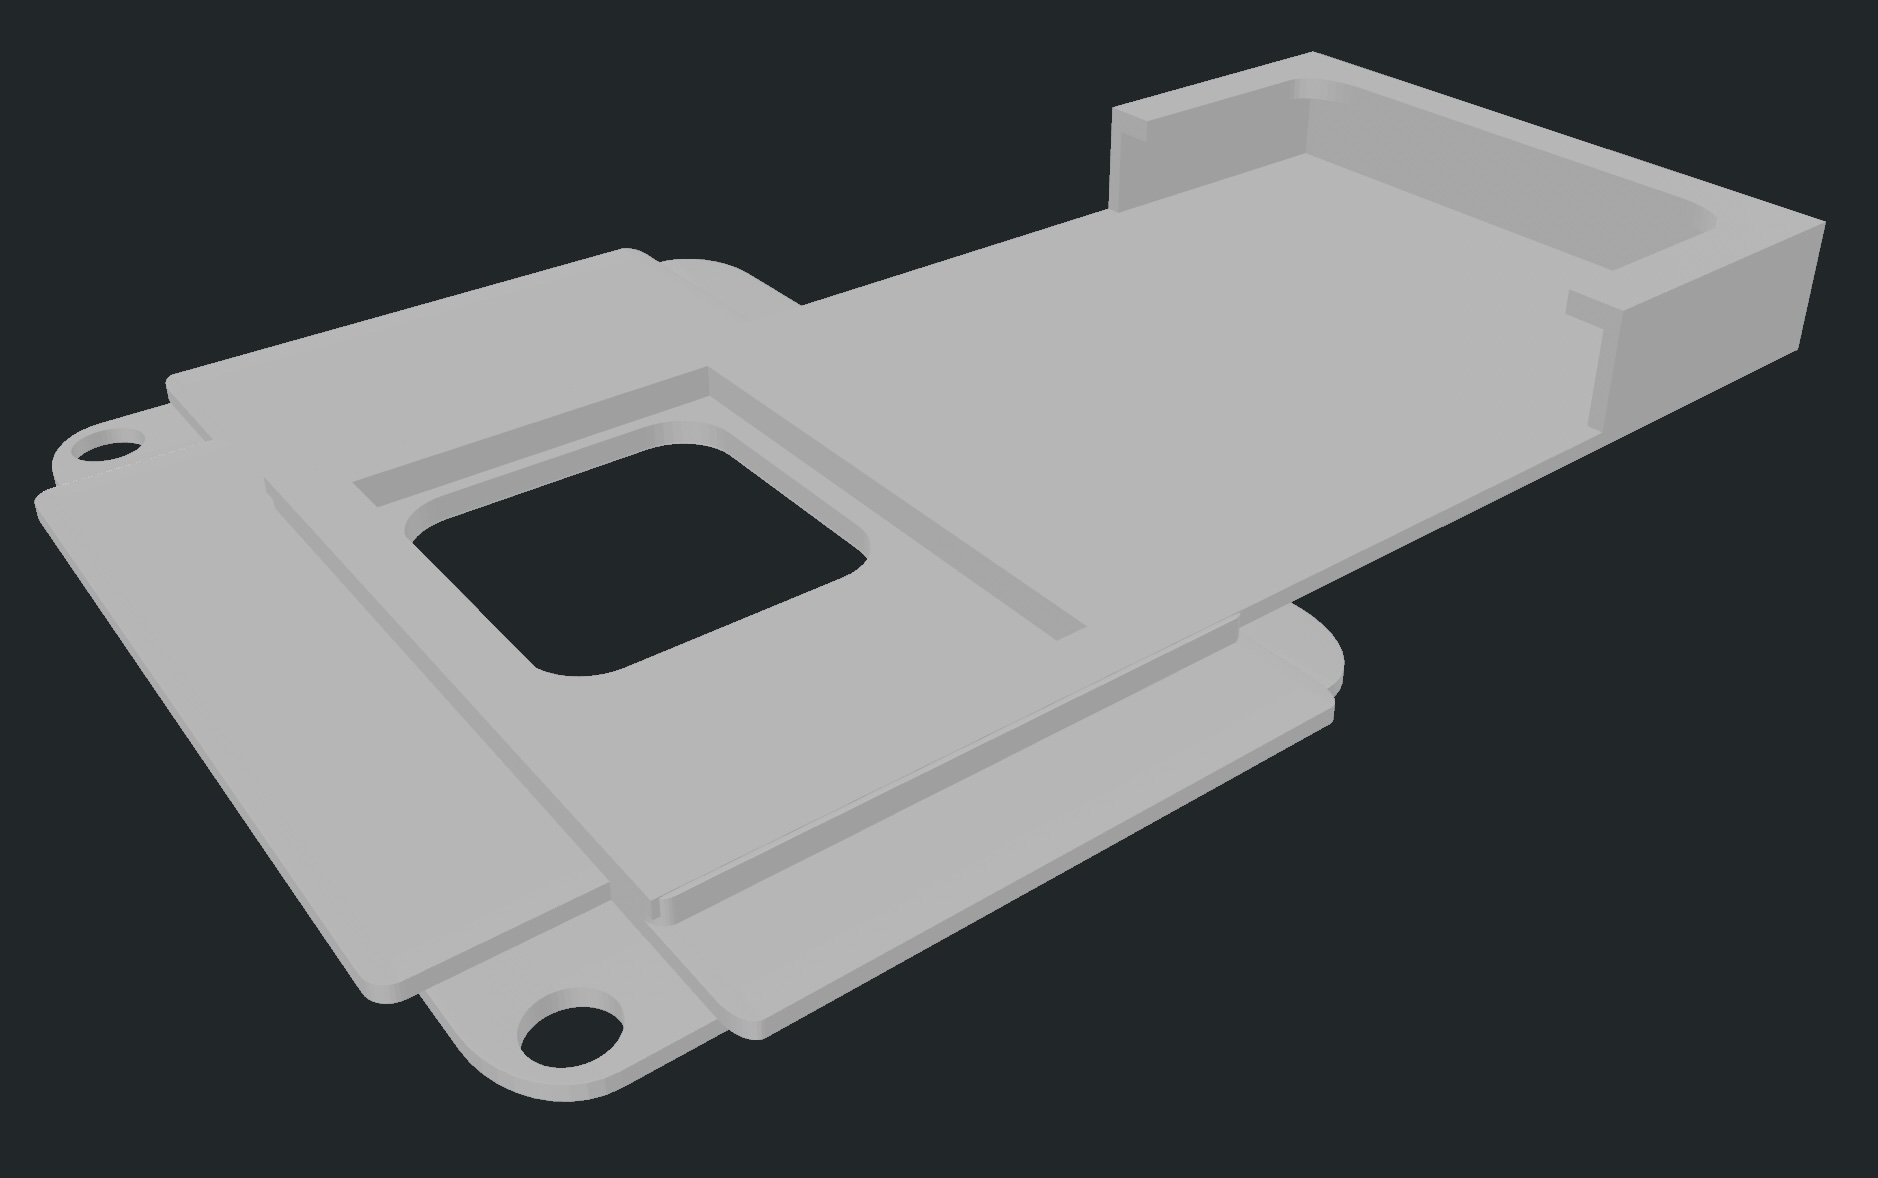
The finished backplate screw onto the Elgato Prompter, just like the official accessories. My iPhone 17 Pro slides into the frame and stays put during recording. The fit is snug enough that I don’t worry about the phone falling out, but loose enough that I can quickly remove it when needed.
Conclusion
Whether I’m reading a script or making eye contact with remote guests, it helps me create more engaging video content. And with a custom 3D printed backplate, I can use my iPhone as the camera without any compromises.
If you have an iPhone model that isn’t supported by existing templates, Tinkercad makes it easy to design your own. Measure your phone (in its case if that’s how you’ll use it), add a few millimeters of tolerance, and you’ll have a working backplate in an afternoon.
My model is avaiable here.